Every login form on this page was designed and coded in-house by uiCookies — this is our own pack, not a roundup of CodePen embeds. Each design is a single self-contained HTML file: the CSS and vanilla JavaScript are inlined, there are no external libraries or fonts, and nothing needs a build step.
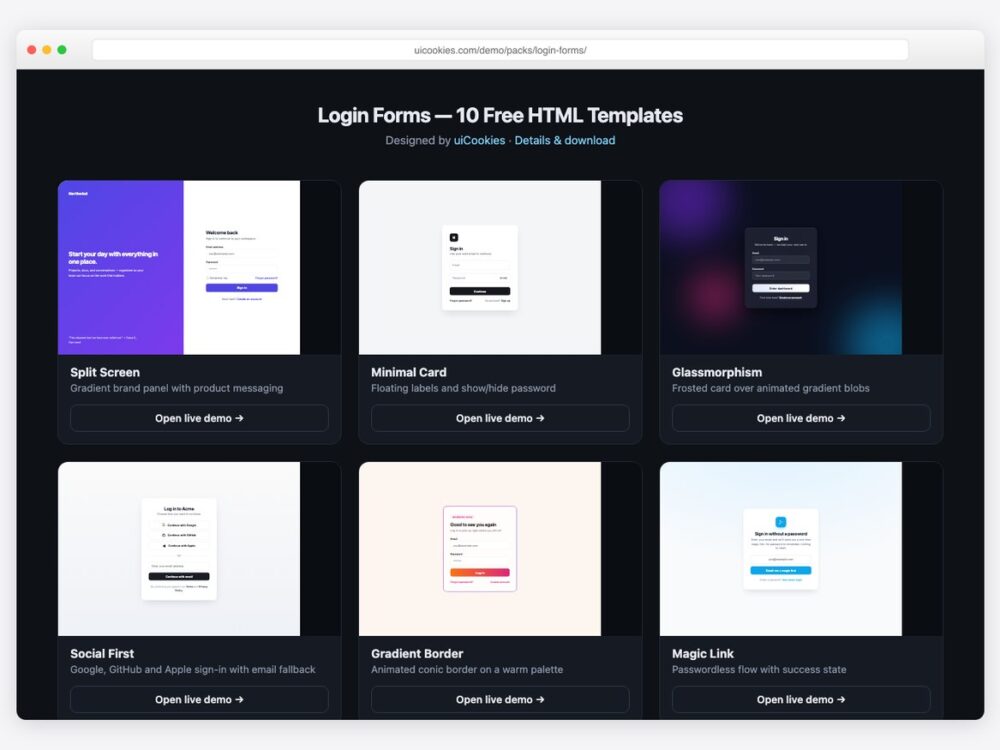
The ten designs cover the directions login screens actually take in real products: split-screen SaaS layouts, minimal cards, glassmorphism, social-first OAuth flows, passwordless magic links, a combined login and registration form, and a few with more personality. All of them are responsive, use accessible labels and focus states, and ship with the right autocomplete attributes so password managers behave.
Download all 10 (free) Browse live demos
The designs
1. Split Screen Login
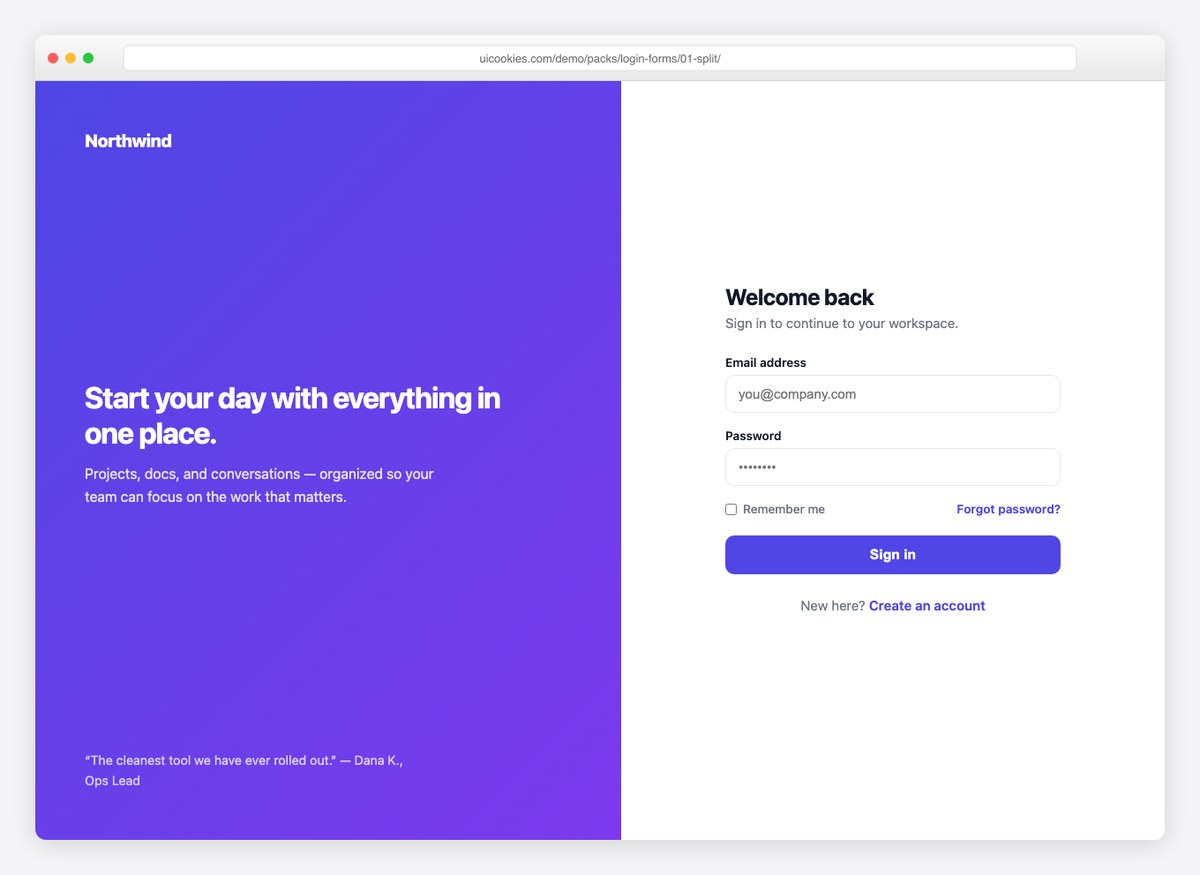
The classic SaaS pattern: a gradient brand panel with product messaging on the left, a focused sign-in form on the right. The panel collapses away on mobile so the form always comes first. A safe, professional default for any product login.
2. Minimal Card with Floating Labels
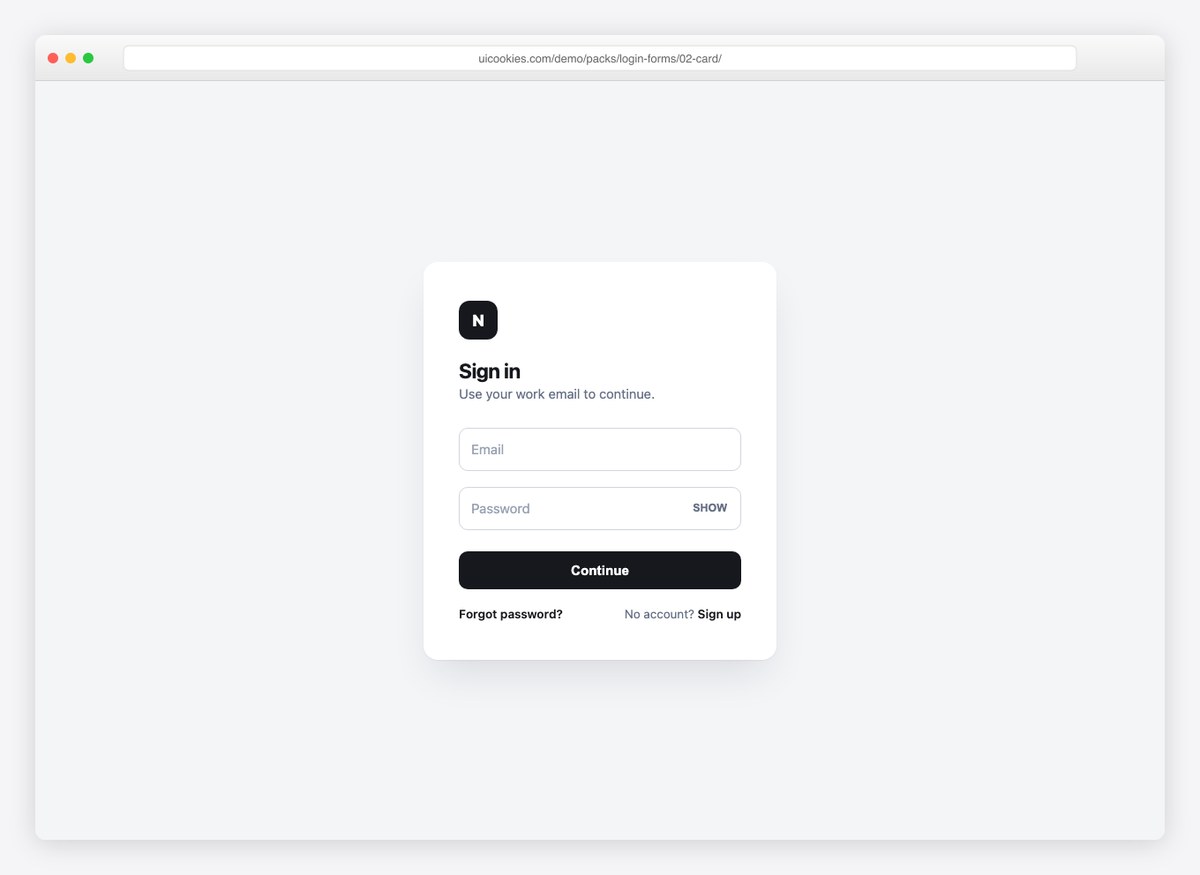
A single white card with floating labels that lift as you type, plus a show/hide password toggle. This is the design to reach for when the login should disappear into the product rather than make a statement.
3. Glassmorphism Login
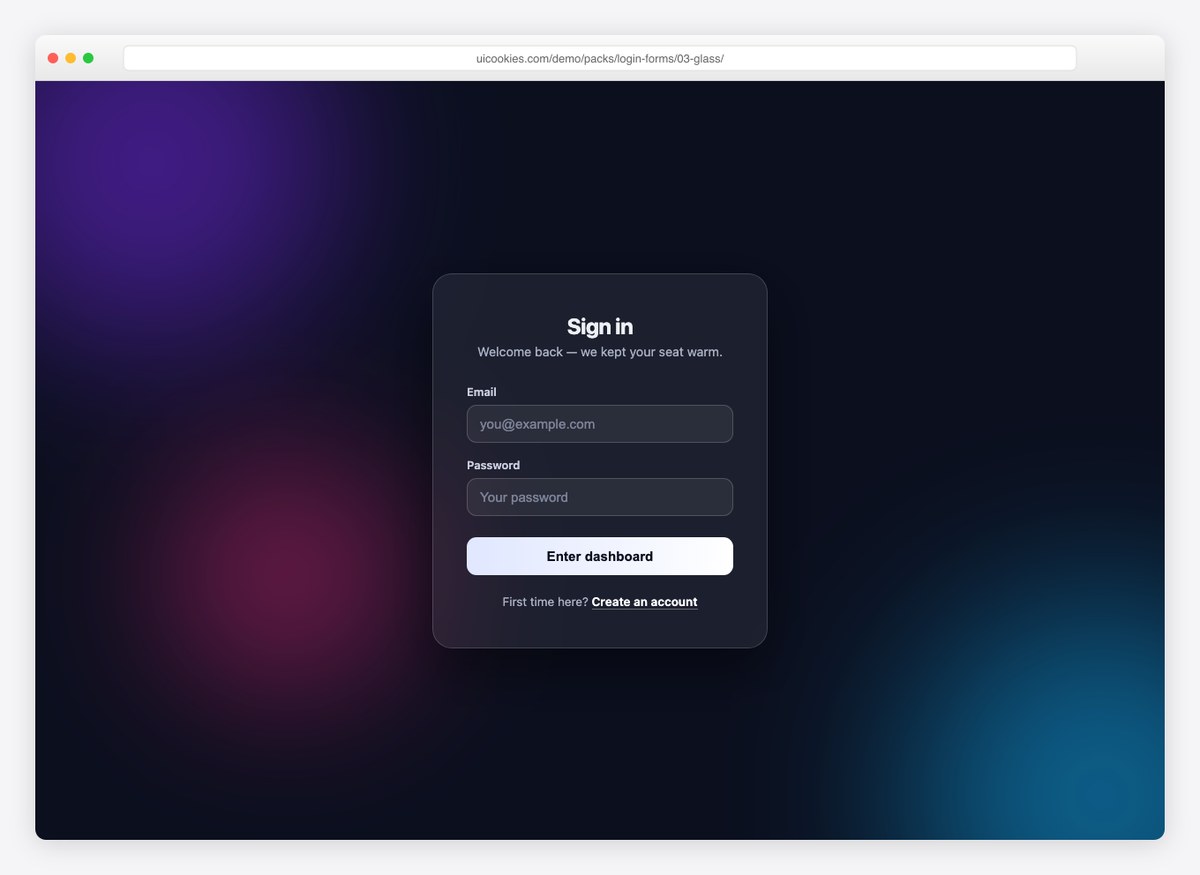
A frosted-glass card floating over slowly drifting gradient blobs. The blur and translucency come from plain CSS backdrop filters — no images, no canvas — so the whole effect costs a few kilobytes.
4. Social-First Login
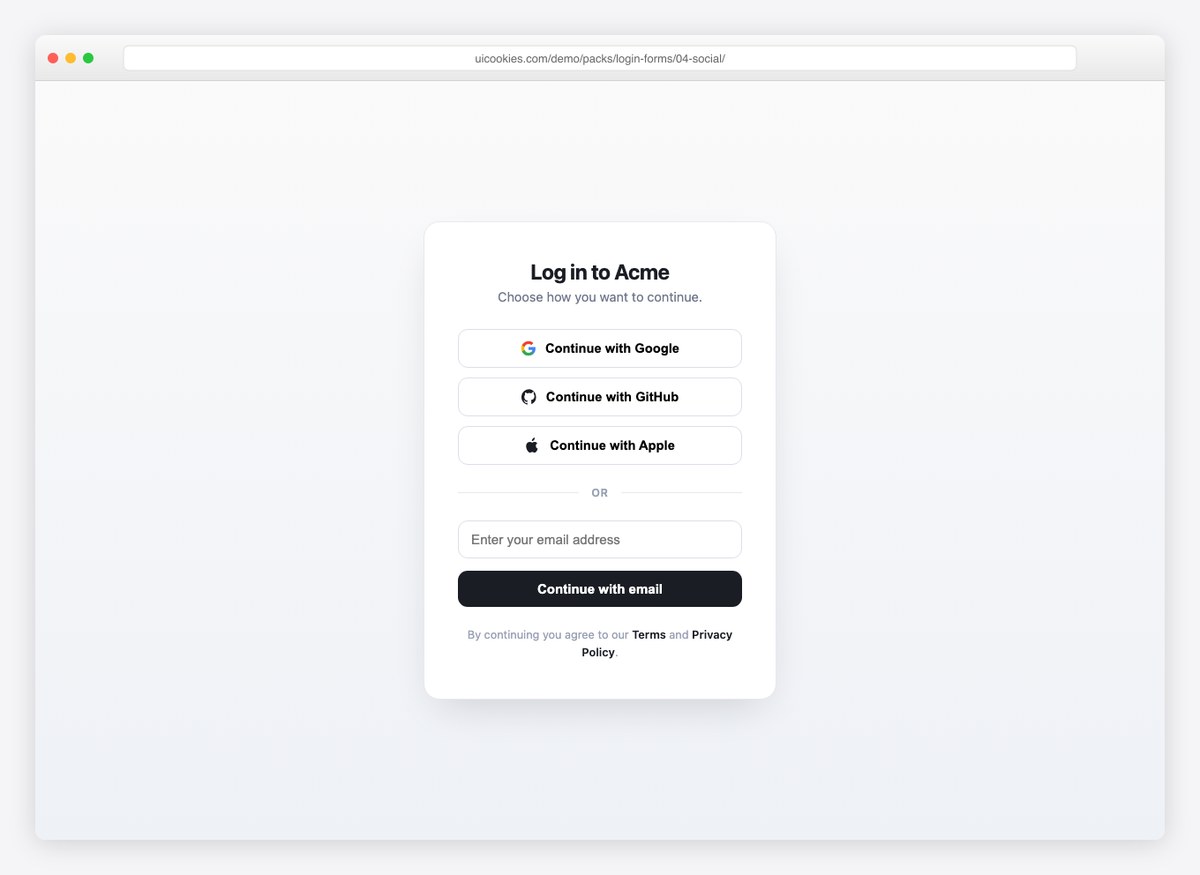
Google, GitHub, and Apple buttons lead, with an email fallback below the divider. Use it when most of your signups come through OAuth and the email path is the exception, not the rule.
5. Animated Gradient Border
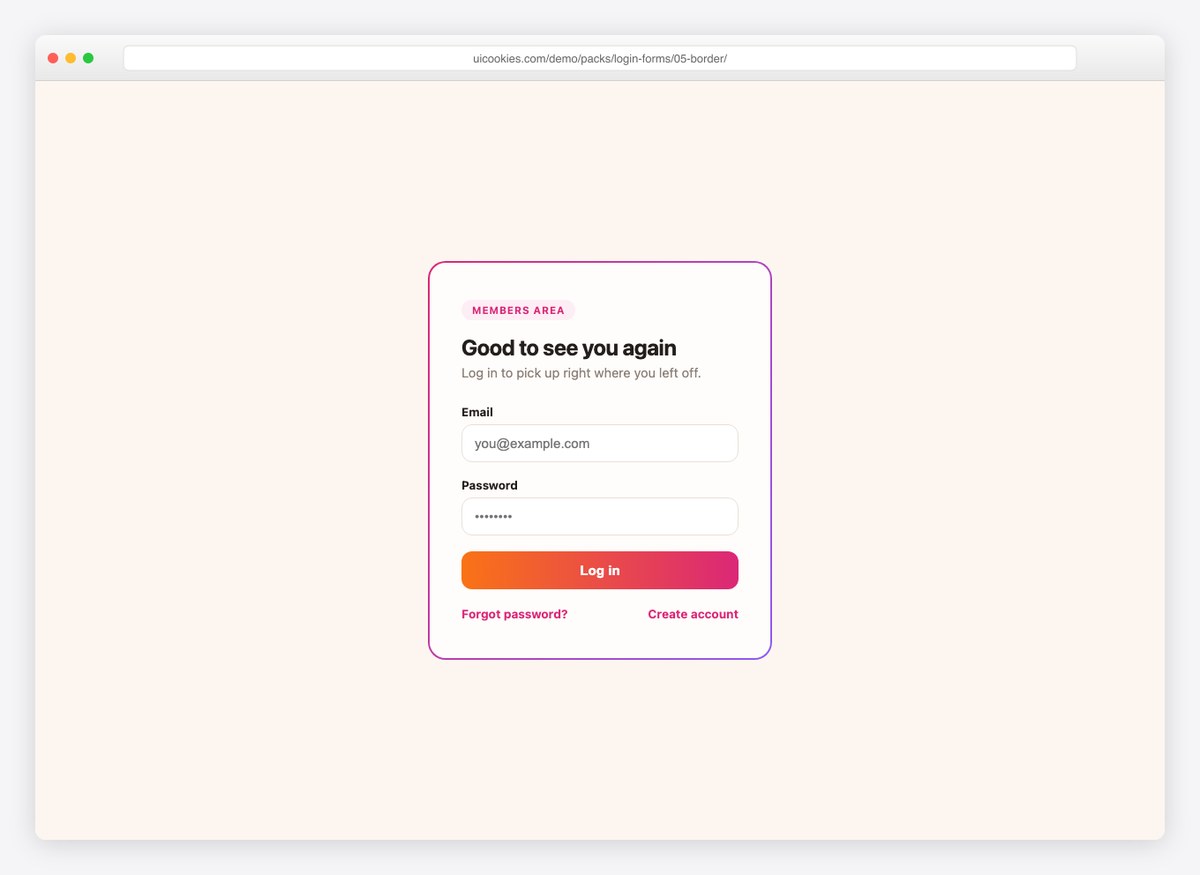
A warm card wrapped in a continuously rotating gradient border, done with an animated background rather than JavaScript. Distinctive without being loud — good for membership sites and communities.
6. Passwordless Magic Link
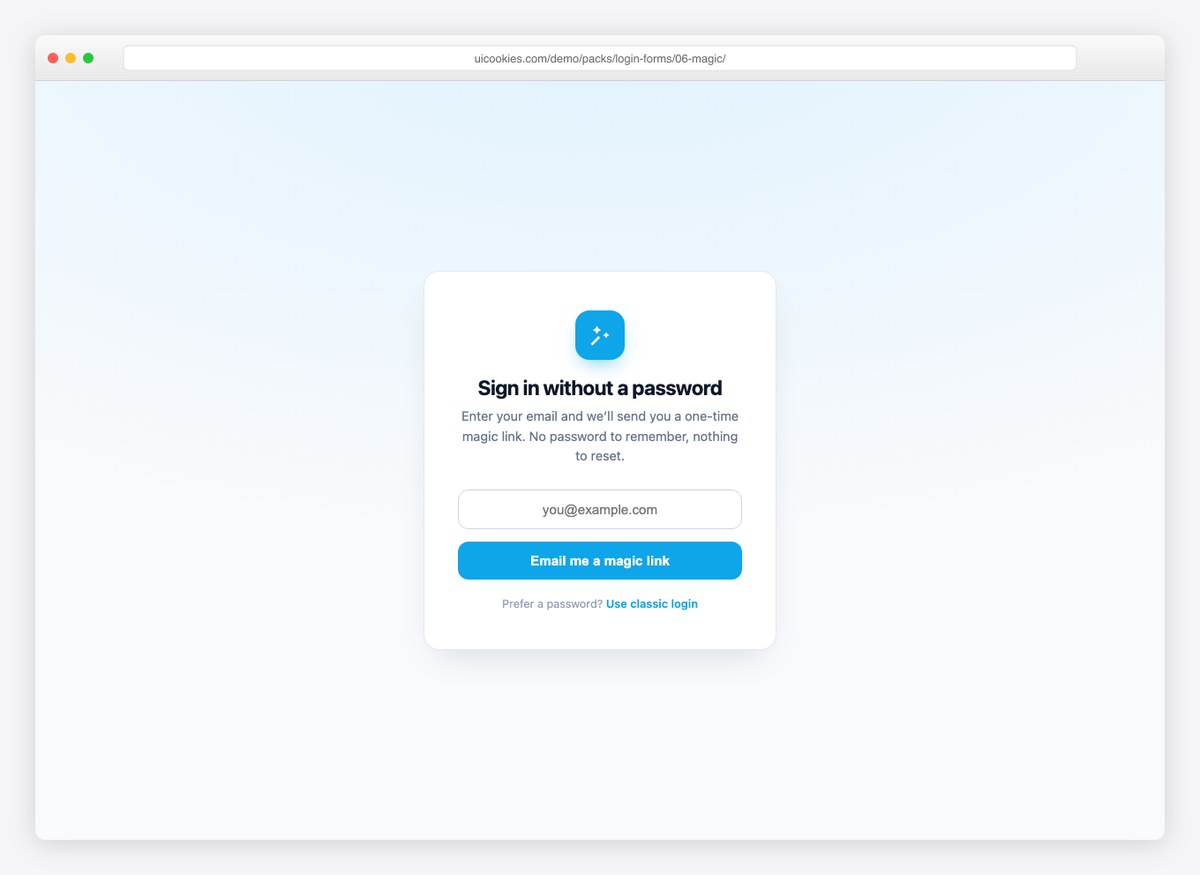
One email field, one button, and a built-in success state that confirms where the link went. If your product signs users in by email link, this ships the entire front-end of that flow.
7. Neobrutalist Login
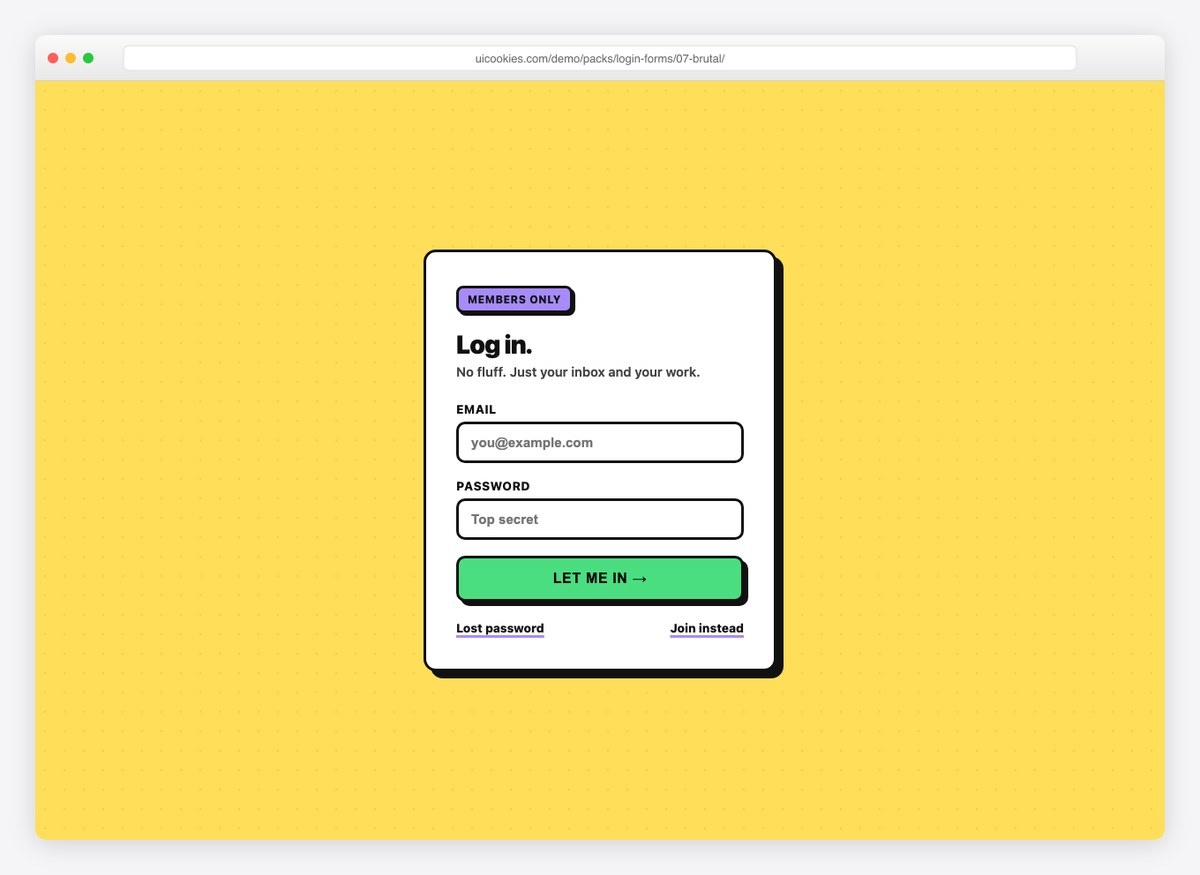
Thick black borders, offset shadows, and a button that physically depresses when clicked. For brands with personality — portfolio sites, indie products, anything that refuses to look corporate.
8. SaaS Login with Social Proof

A split login where the dark panel carries stats and a customer quote, plus an SSO button under the main action. Modeled on how enterprise SaaS products actually present their sign-in.
9. Login + Registration Tabs
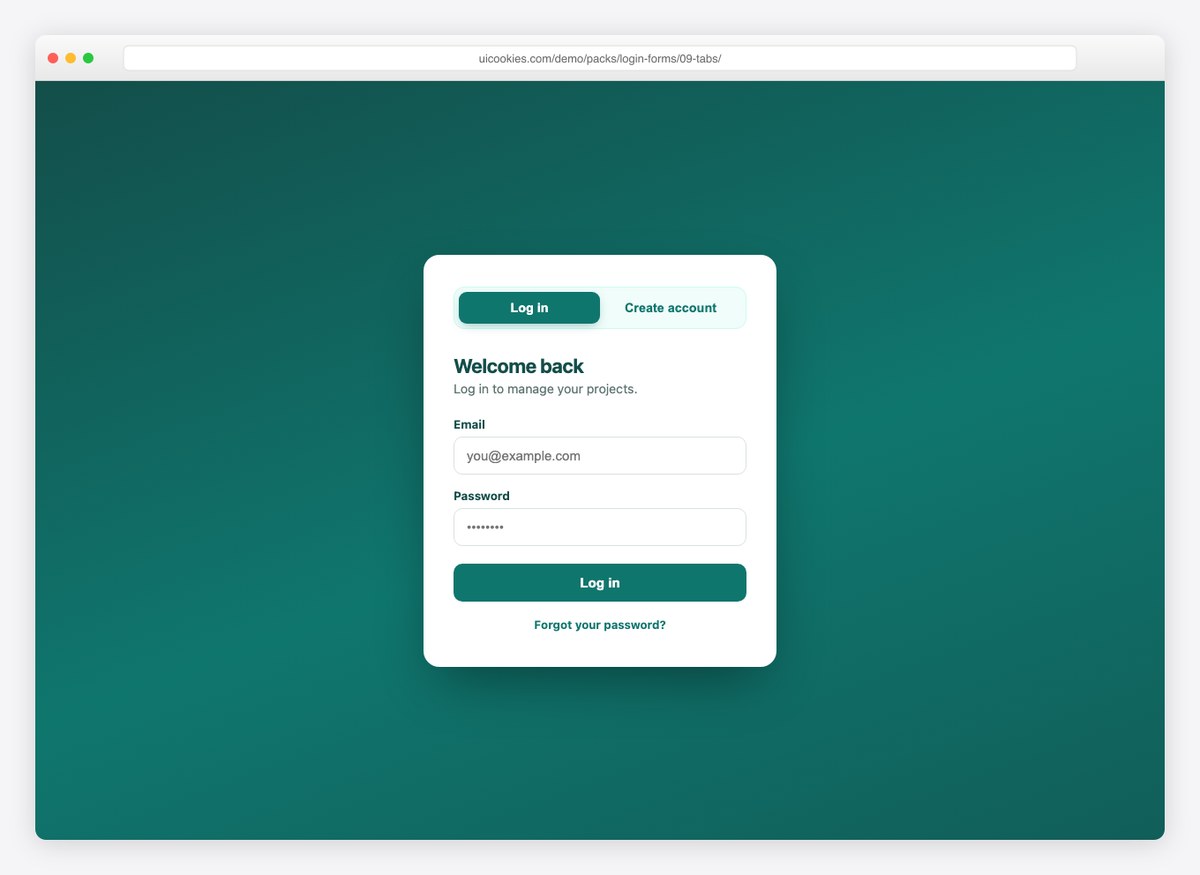
Two forms in one card behind an accessible tab switcher: log in on one tab, create an account on the other. If you need a free registration form template as well as a login, this covers both.
10. Terminal Login
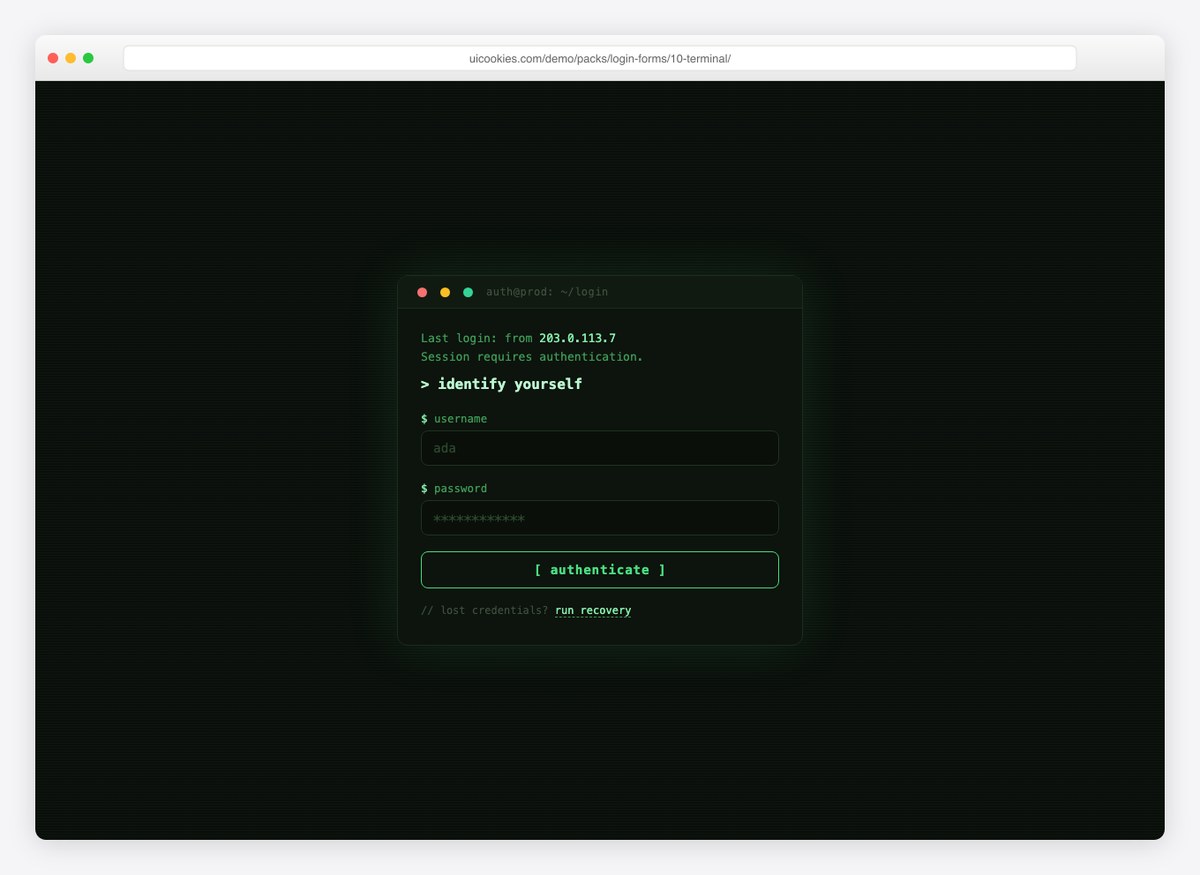
A developer-console take on authentication: monospace type, scanline background, blinking cursor, and prompt-style labels. Perfect for dev tools, APIs, and anything aimed at engineers.
How to use these forms
Download the pack, open any design’s index.html, and copy it into your project. The forms are demo-safe — submissions are prevented with an onsubmit attribute — so wiring one up means removing that attribute and pointing the action at your endpoint. Each file keeps its colors and spacing in a small CSS block at the top, which makes rebranding a design a minutes-long job. The pack page has the full details.
Frequently asked questions
Are these login forms really free?
Yes. The whole pack downloads free from the uiCookies pack page — no signup, no email gate. See the uiCookies license page for attribution details.
Do the forms work with Bootstrap, React, or Vue?
They are plain HTML, CSS, and vanilla JavaScript, so they work in any stack. In React or Vue, paste the markup into a component and move the small inline scripts into your event handlers. Nothing depends on Bootstrap, but nothing conflicts with it either.
Is there a registration form included?
Yes — the Login + Registration Tabs design includes a full create-account form with name, email, and password fields behind an accessible tab switcher, and the Magic Link design covers passwordless signup flows.
How do I connect a form to my backend?
Each form tag carries an onsubmit attribute that blocks submission for demo purposes. Delete that attribute, add action=”/your-endpoint” and method=”post”, and give the inputs name attributes matching what your server expects.
Looking for full page designs instead? Browse our complete catalog of free HTML website templates.